Create events after reservation
How to automatically generate new events in your Google Calendar whenever a reservation is made. This functionality ensures that you have all the necessary reservation details conveniently available in your calendar, making it easier to manage your schedule and stay organized.
TheBooking offers you the flexibility to choose a different destination calendar for each availability source. What's more, you can enable or disable events creation on a per-service basis. This means that you have full control over where your reservation events are created, allowing for a highly customizable setup.
Whether you want to consolidate all reservation events into a single calendar or distribute them across multiple calendars, TheBooking provides the flexibility to achieve your desired setup.
Please note that this feature requires a connected Google Account. Make sure to connect your Google Account before proceeding.
Step 1 - Select a destination calendar
The first step is to choose a destination calendar where the reservation events will be created. Depending on your availability setup, there are two different cases to consider:
Case 1: Availability provided through Google Calendar 3-way integration
- Go to the Availability > Google section.
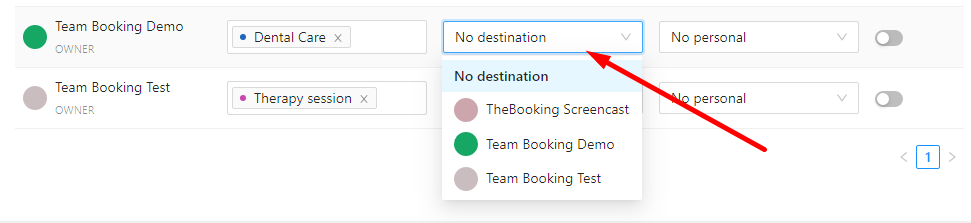
- Note that each Google Calendar record (Source Calendar) has a Destination field associated with.
- In this Destination field, choose a specific Google Calendar as the destination for the reservation events originated from the Source Calendar's availability.
While it is technically possible to select the same calendar as the destination for reservation events as the Source Calendar, it is not recommended to do so. Keeping the destination calendar separate offers several advantages, including the ability to hide the Source Calendar from your Google Calendar main view. This allows you to prioritize the reservation events without cluttering your main calendar view.
Case 2: Availability provided through Working Hours planner
- Go to the Availability > Working Hours section.
- Select the desired availability plan and access its Settings panel.
- In the Google Calendar integration tab, locate the option to choose the destination Google Calendar.
- Select the appropriate destination calendar for the reservation events generated by the selected availability plan.
Step 2 - Enable the event creation setting
- Go to the Services section of the plugin.
- Locate the specific service for which you would like to enable the creation of events in Google Calendar.
- Open the Service > Personal Settings.
- Open the Behavior tab and enable the Add reservation in Google Calendar setting.
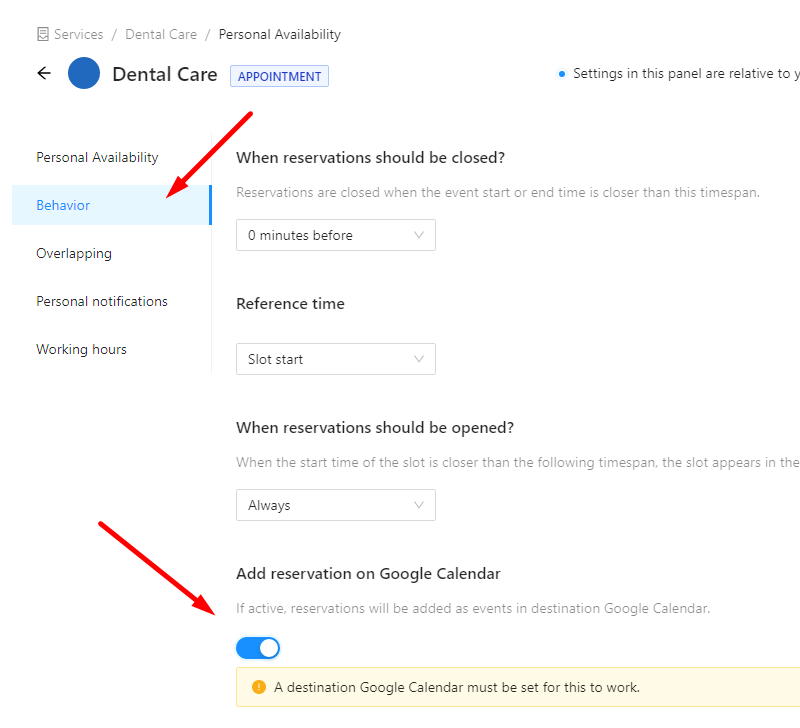
This will unlock a range of additional settings to customize the properties of your reservation events, including:
- Event summary (title): Specify the title for the reservation event.
- Event description content: Add relevant information to the event description.
- Event color: Choose a color to distinguish reservation events in your calendar.
- Add customers as guests: Include customers as guests in the event.
- Create Google Meet link: Generate a Google Meet link for virtual appointments.
- Google Calendar event reminders: Configure reminders to ensure timely notifications.