Google Project setup
A Google Project is a collection of settings, APIs, authentication credentials, and other resources that allow applications to interact with various Google services, such as Google Calendar.
In the case of TheBooking, a Google Project is required to allow the plugin to interact with Google Calendar and synchronize booking information between the plugin and Google Calendar. The Google Project contains the necessary authentication credentials and other settings that enable the plugin to access Google Calendar accounts securely.
When you set up a Google Project and link it to your TheBooking plugin, the plugin will be able to perform actions such as creating and updating events on Google Calendar, as well as retrieving events and availability information from the calendars to display to customers.
Let's see how to create and configure a Google Project for TheBooking.
Only one Google Project is needed for TheBooking plugin, regardless of the number of service providers involved. This Google Project should be set up by the person in charge of the plugin installation, and the same person should complete the required configuration steps. Once the Google Project is set up, each service provider can connect their own Google Calendar to the plugin by initiating an authorization procedure within the plugin's backend. The process is straightforward and only requires the service provider's Google Account credentials.
You do not need to activate any Cloud Trial or paid storage option. Also, google changes the console aspect from time to time. If you feel that this guide is not updated to the current state, just drop a message to our support.
Step 1
Log into your Google Account.
Step 2
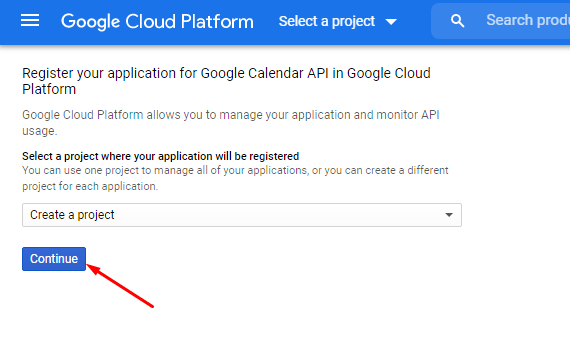
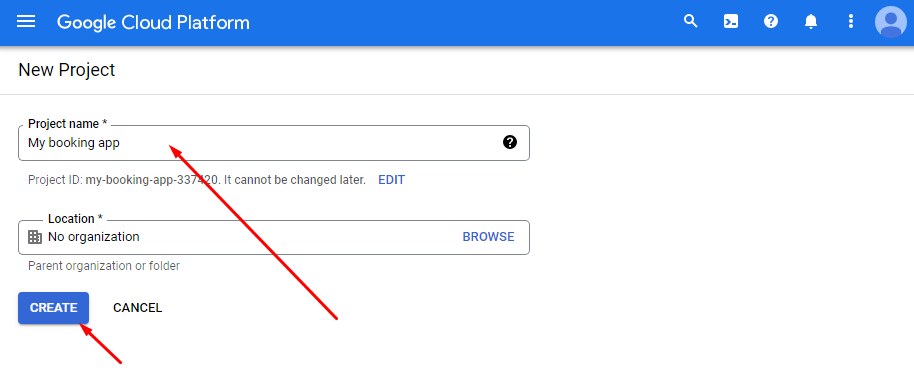
Open the Google API Console (the link should open the page in a new tab). If a Google Cloud free trial banner appears on top, just dismiss it. Note that Create a project should appear in the dropdown.
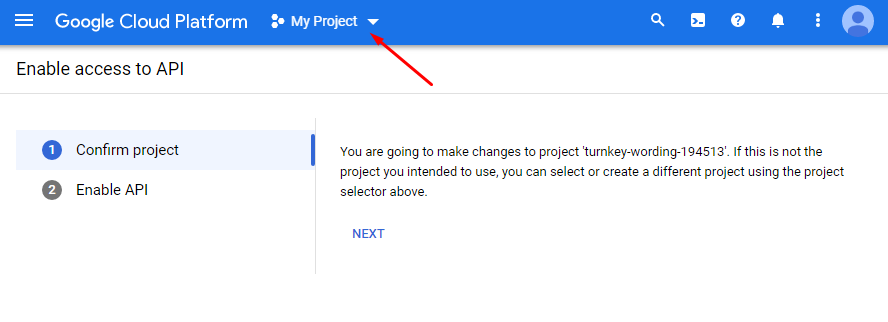
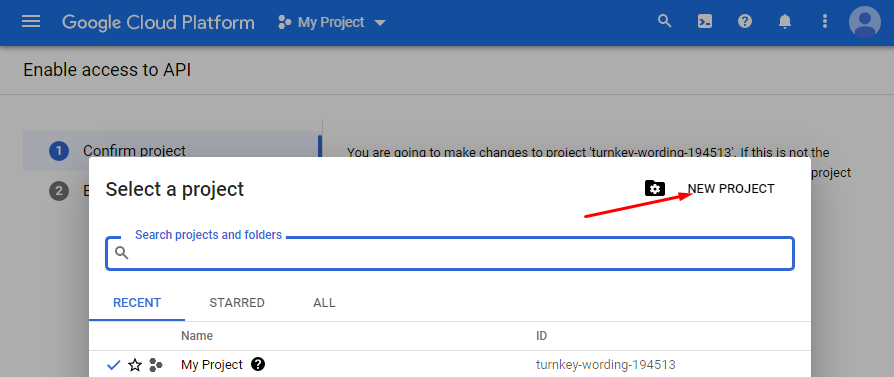
If you have other Google Projects in your Google API console, one of them is automatically selected and the console notifies you that you are going to edit it. Don't do it: create a new Google Project instead, as per screenshots below (click to open).
Creating a project when another project is selected
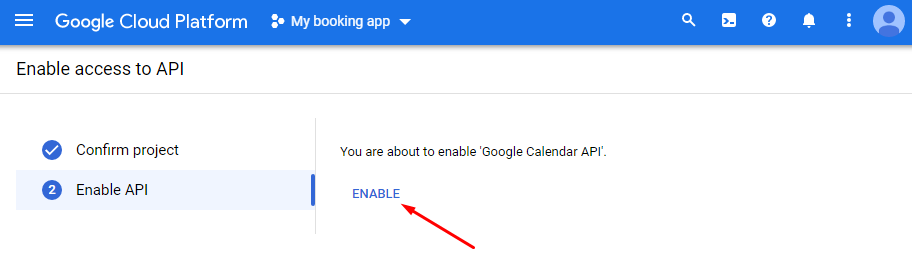
Step 3
The Google Calendar API are enabled. Click Go to credentials.
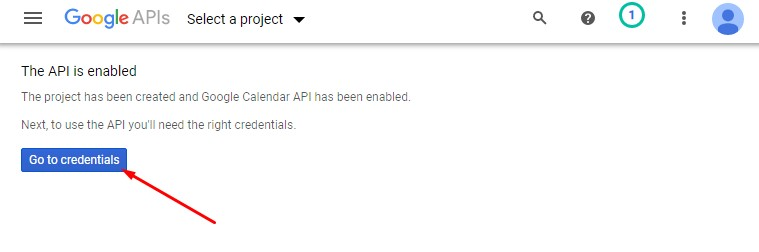
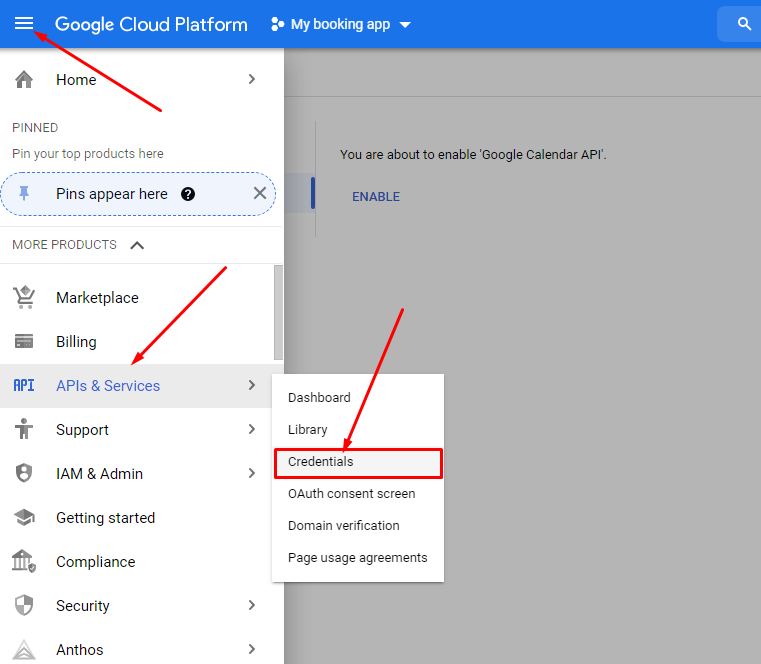
In case you don't see the Go to credentials button, navigate the menu to reach the credentials section.
How to reach the credentials section
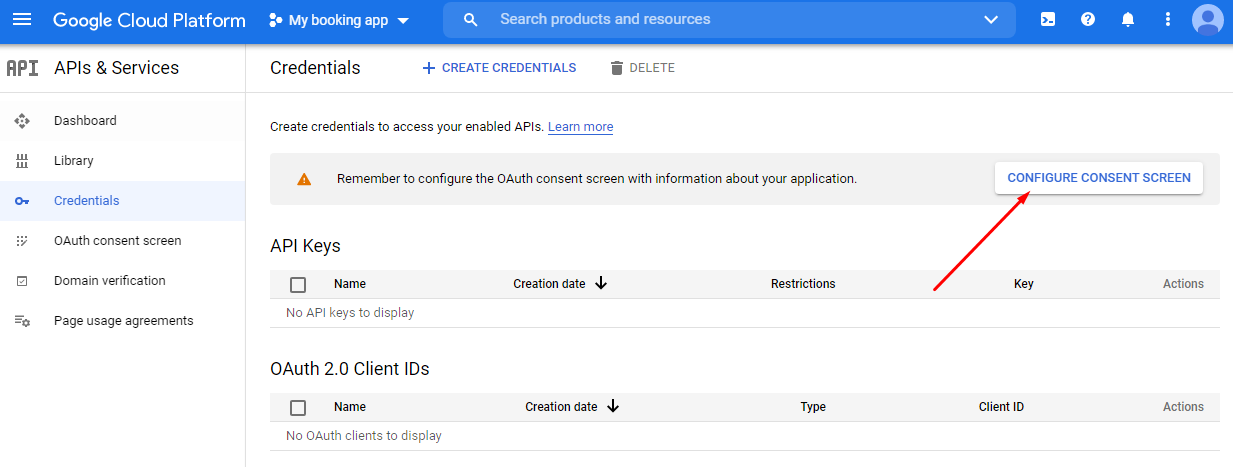
Step 4
Click on Configure consent screen.
Select the External option and click on Create.
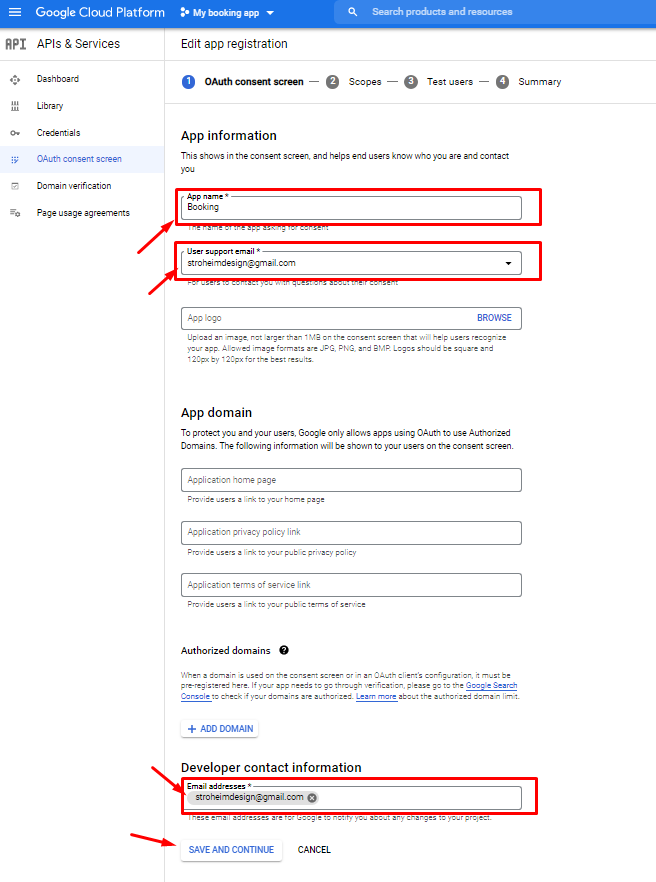
Step 5
In the next step oAuth consent screen, choose an App name (it can be anything, take note of it as you have to provide it in TeamBooking later).
Select the User support email from the dropdown.
Under Developer contact information insert your Gmail address (it can be equal to the User support email).
Then click Save and continue.
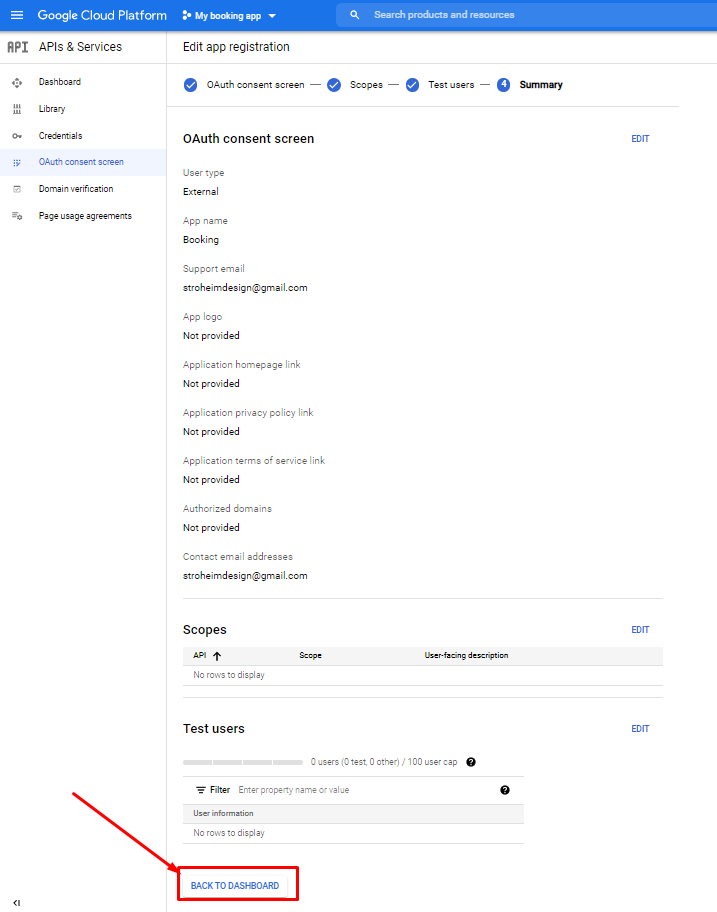
Step 6
In the next 2 steps (Scopes and Test users), DO NOTHING. Just hit Save and continue.
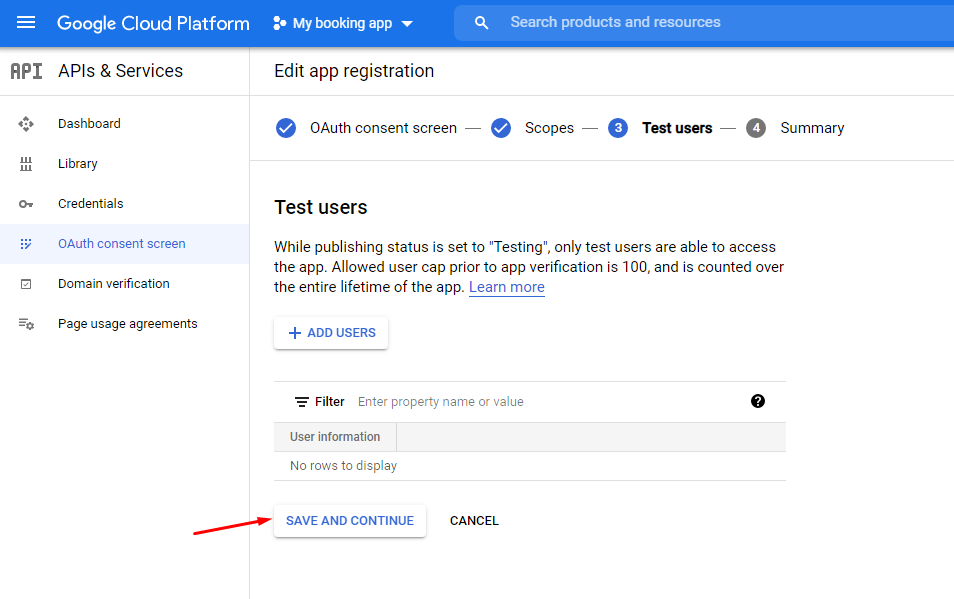
At the Summary step, hit Back to dashboard.
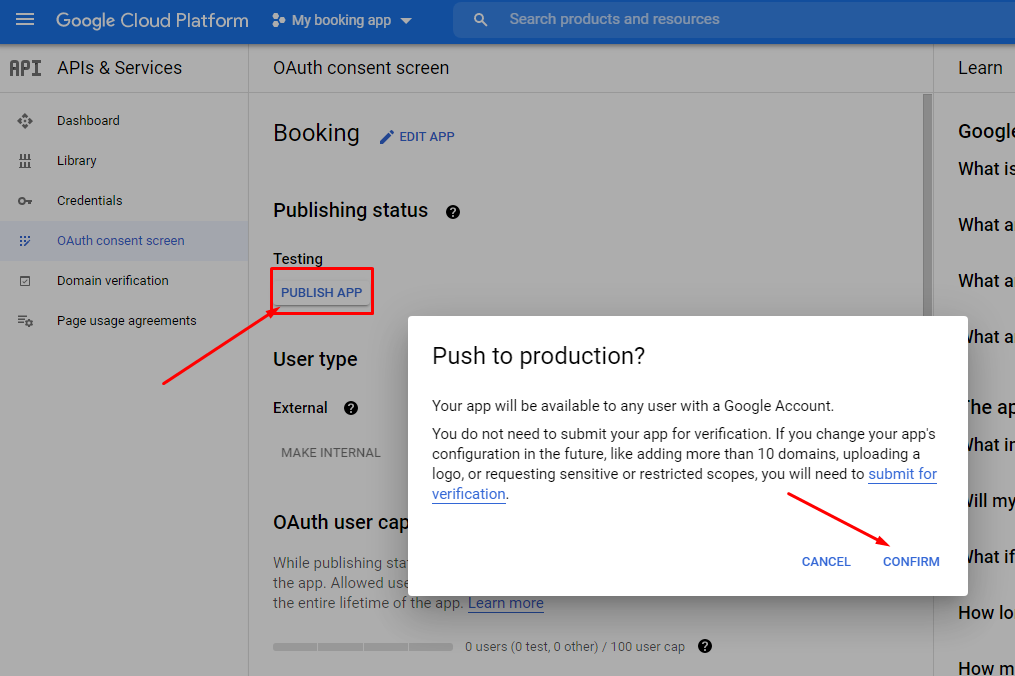
Step 7
Now click on Publish app and confirm.
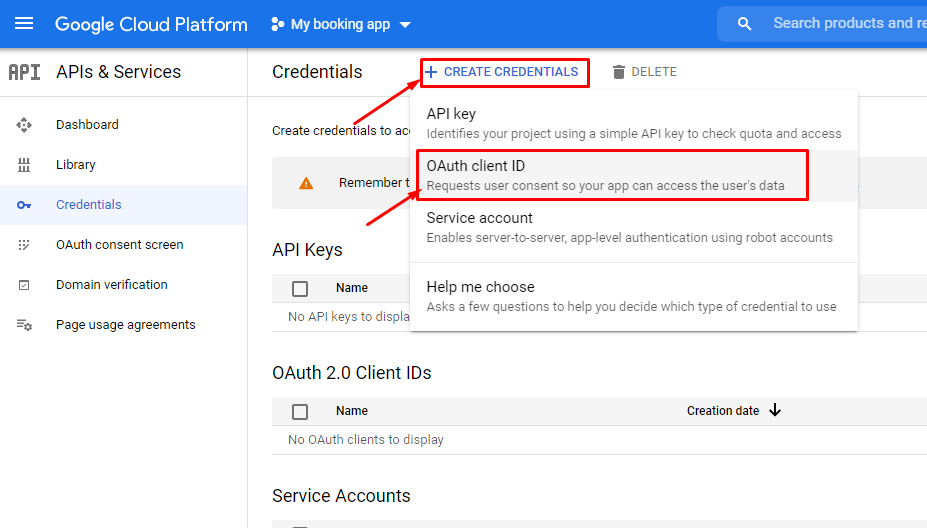
Step 8
Back in the Credentials section, click on Create credentials and select OAuth client ID from the dropdown.
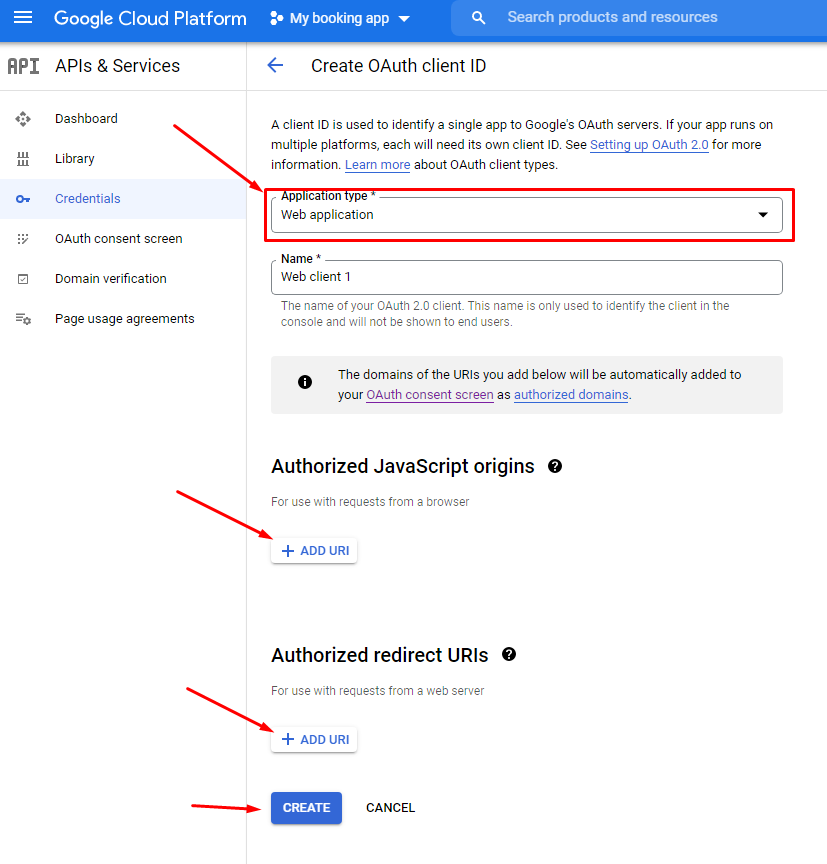
Step 9
Select Web application in the dropdown. Insert the Authorized Redirect URI and the Authorized Javascript origins.
Where you can find both? Just open another browser tab and navigate to the TheBooking admin dashboard. Go to Settings > Google Calendar and copy the URIs from there. Ensure that you are pasting them in the correct destination fields.
Those URIs need to be https for security reasons. Therefore your website need to have an SSL certificate in order to use Google APIs. If the URIs that TheBooking displays are of http type, then ask to your hosting how to activate an SSL certificate.
Finally, hit the Create button.
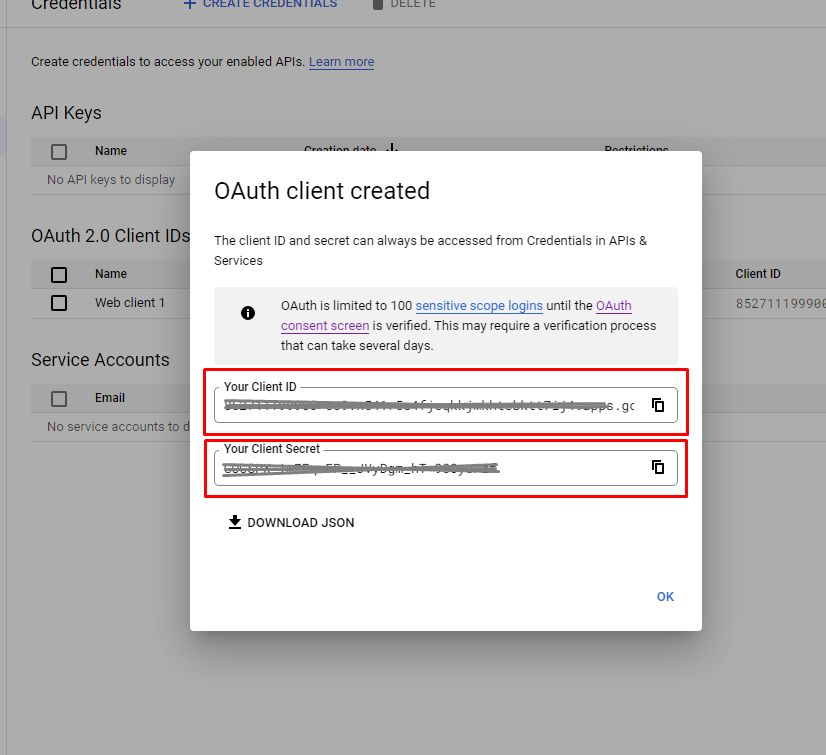
Step 10
Take note of the Client ID and Client Secret.
Conclusion
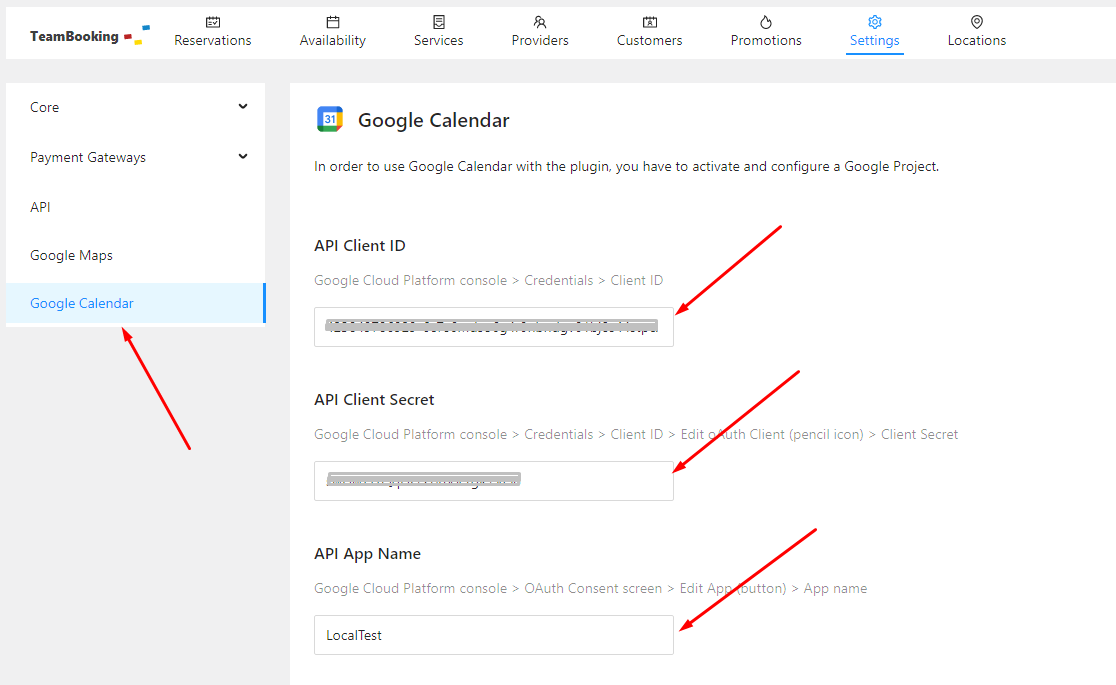
Congratulations! You have successfully created and configured your Google Project. To use this with TheBooking, you need to enter the following three pieces of configuration into the plugin, which you should already have noted:
- App name. The name you gave your Google Project.
- Client ID. The unique identifier for your Google Project. You can find it in the "Credentials" section of your Google Cloud Console.
- Client Secret. A secret key used to authenticate your Google Project with TheBooking. You can find it in the same "Credentials" section as the Client ID.
Once you have this information, head back to the Settings > Google Calendar section of TheBooking dashboard. You'll see fields for each of these configurations. Simply fill in the appropriate information, and you're ready to start integrating your Google Calendar with TheBooking!"
When editing each field, hit the checkmark button to save the changes.